TL;DR
Reading data into RStudio is a bit more complicated that just opening a spreadsheet in Excel. Thankfully, once you know the basics, the code is the same every time. In this post we will cover how to read in data from a few common file formats.
Introduction
One of the first things you might want to achieve is to load your data within RStudio. But to make this task easier, it is often best to set the work directory within RStudio as R will look for files within the folder you select. This also means that you do not have to type the full path name to the file/folder you would like to use within R, which can often be quite long.
Setting the working directory
The working directory within R often is already set for you and most likely defaults to the ‘Documents’ folder. But if you would like to check this you can use the following code:
getwd()
#check the current work directory
This will print the work directory into the console e.g. [1] “Z:/My Documents”.
At the beginning of your R journey you may want to keep the directory as it is and simple place files/folders within the current working directory. But as you become more proficient, you will most likely be working on different projects and want to store your files within different folders or even within cloud sharing platforms such as OneDrive.
Whilst you can set the work directory from within RStudio by:
setwd("/path/to/folder")
#setting the work directory
Operating system differences
It is worth noting here that there are some differences between defining file paths on Windows and Mac machines. On a Mac, the file path is separated by forward slashes (/). However, on Windows machines the file path is separated by back slashes (\). This may initially not seem an issue however the back slash is an escape character in R. The escape character has several uses (we will not discuss these here but you can find more information here) however when it is included in a Windows file path it presents a problem with the file path character string not being interpretted correctly. To correct this, we need to insert two backslashes each time we see one in the file path. This equates to escaping the string, and then inserting a backsl;ash.
It is often better to get used to creating and using ‘Projects’ within R studio as after creation, the working directory is automatically set for you every time you open the project file. To do this select File -> New Project then:
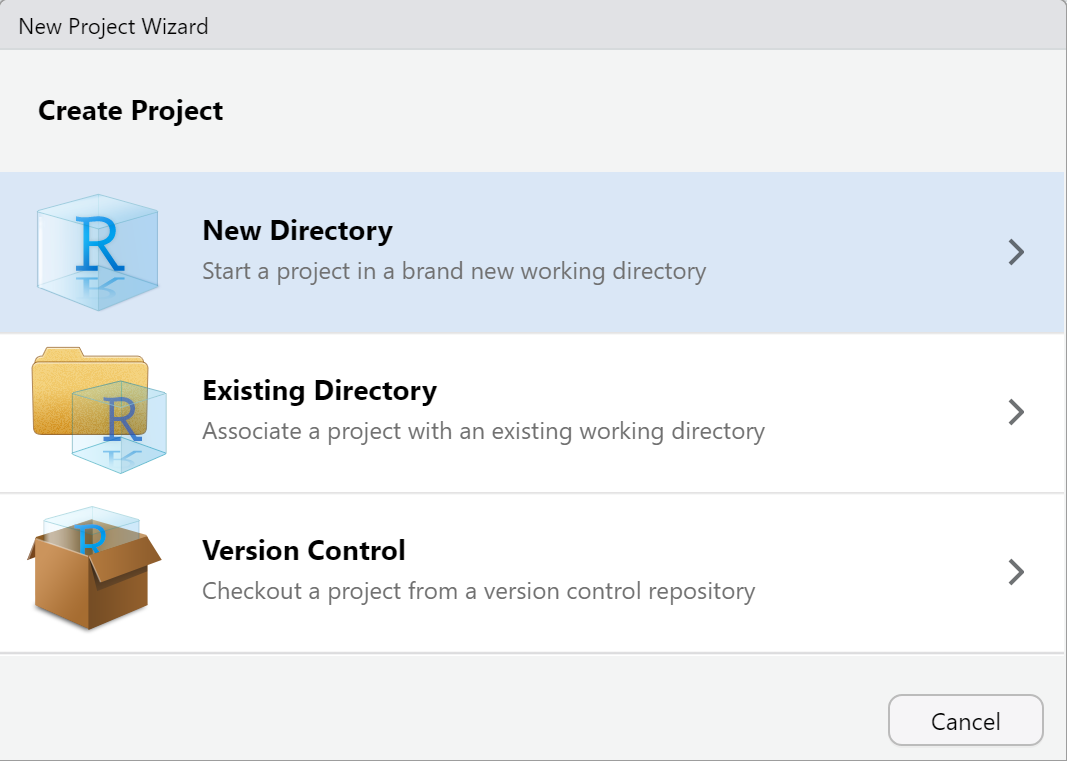
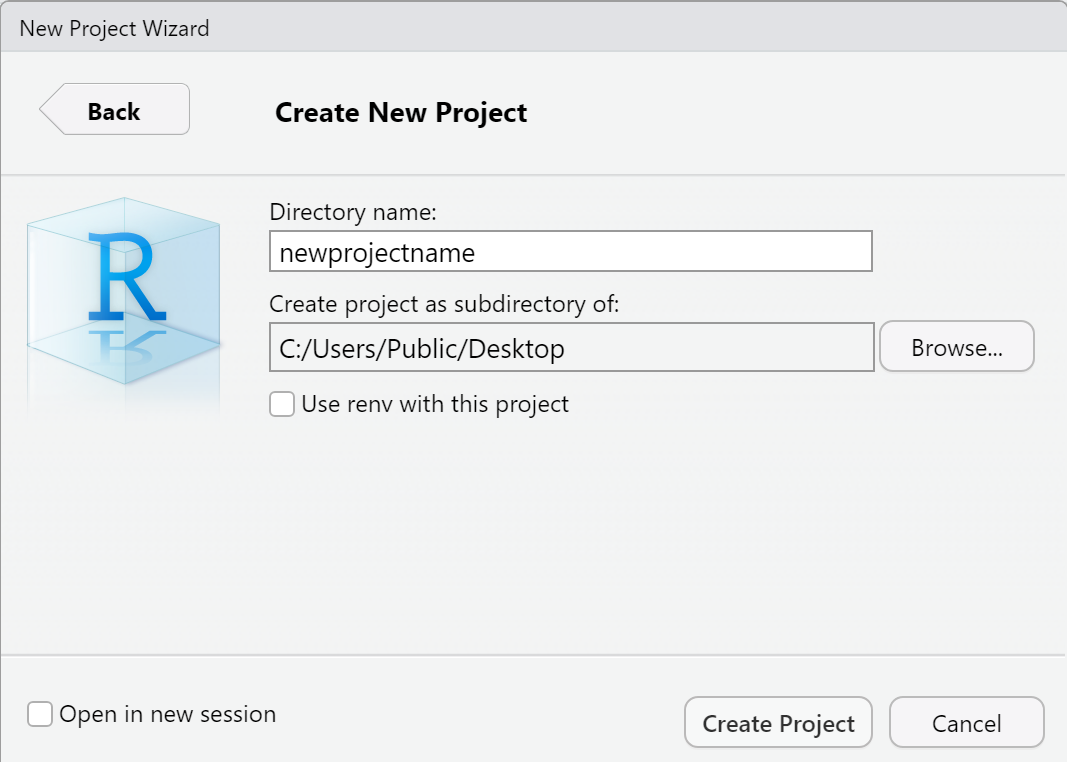
Now after you have created your project, every time you open the project file, R will automatically set the working directory to its location. So if you have any files you want to import into R, then you should place them within the same directory as the project.
Reading data into R
Whilst there are many types of data structures you can use within R (see here for a description), when processing health data we often just want to import data that is usually in an Excel or text file format.
However, many tutorials will start with how to enter data and assign data to objects within R rather than import data sets e.g.
Data <- c(1,2,3,4,5)
#The <- means assign the following numbers to this object called Data
#The c means that you are writing out a list
This is good to learn the basics but doesn’t help you conduct what you really want.
To read data into R there are packages (see here to explore packages) available that can help you with this task but it does depend on the type of file you are trying to read into R. The most common types of files that need to be entered into are are: .csv, .txt and .xlsx files. For each of these types of files we have provided an explanation below.
.csv files
These are perhaps one of the most common formats that data is provided in and stands for ‘comma separated values’. Do accomplish this, you need to know where your data is currently stored, the filename and what you would like to call the R object.
The code to accomplish this is:
Data <- read.csv("data.csv", header = TRUE)
#The <- means assign the following numbers to this object called Data
#read.csv is the function you use
#data.csv is the name of the file
#header = TRUE imports the first line as variable names
If you see strange symbols at the start of variable names after importing the data, then you need to specify the encoding within the file by including the following:
fileEncoding = "UTF-8-BOM"
#Data <- read.csv("data.csv", header = TRUE, fileEncoding = "UTF-8-BOM")
.txt files
The next file type is .txt files and these are entered into R in much the same way as .csv files:
Data <- read.table("data.txt", sep = "", header = TRUE)
#See previous notes for breakdown
#sep = "" is the code you use to specify the symbol of the separator
.xlsx files
The last type of file we are going to show you how to import is a file saved from Excel. For this type of file, you can import excel data into R using the menu (File -> Import Dataset -> From Excel), but we think it is more useful to learn how to complete this action using code as it can be replicated and shared with any code you make.
For this action, you require the ‘readxl’ package which is also part of the ‘tidyverse’ collection. Therefore to read excel files into R, you enter the following:
install.packages("readxl")
#Install readxl package

library(readxl)
#Load readxl package

read_excel(data.xlsx, sheet = "sheet name", col_names = TRUE)
#You need to insert the full path including the filename, but if you have set the work directory then you just need the filename
#You can specify the sheet name if there are multiple by either inserting the name in "" or by their numeric position
#Col_names = TRUE decides whether to use the first line data as the variable names
There are additional options that can be specified in the code we have outlined, but what we have provided should be enough for you to read in your data for common file types.
Example
In case you would like to practice the above with some data, we have uploaded the following:
If you download the files to your download folder, use the following code to read them into R.
#first, either create a project and move the downloaded file to your project directory or set your working directory where file are located e.g. C:/Users/username/Downloads

Dataset1 <- read.csv("HStack_data.csv", header = TRUE)
#read in the .csv file

Dataset2 <- read.table("HStack_data.txt", sep ="", header = TRUE)
#read in the .txt file

install.packages("readxl")
#install readxl package
library(readxl)
#load readxl package

Dataset3 <- read_excel("HStack_data.xlsx", sheet = 1, col_names = TRUE)
#read in the .xlsx file
Conclusion
Now you know how to set the working directory and also read data into RStudio. The code will be the same every time but make sure you bookmark this page in case you forget!
Complete code
getwd()
#check the current work directory

setwd("/path/to/folder")
#setting the work directory

Data <- c(1,2,3,4,5)
#Reading data into RStudio manually
#The <- means assign the following numbers to this object called Data
#The c means that you are writing out a list

Data <- read.csv("data.csv", header = TRUE)
#How to read in .csv files
#The <- means assign the following numbers to this object called Data
#read.csv is the function you use
#data.csv is the name of the file
#header = TRUE imports the first line as variable names

Data <- read.csv("data.csv", header = TRUE, fileEncoding = "UTF-8-BOM") #If you see strange symbols at the strange symbols at the start of variable names after importing the data then use this code

Data <- read.table("data.txt", sep = "", header = TRUE)
#How to read in .txt files
#See previous notes for breakdown
#sep = "" is the code you use to specify the symbol of the separator

install.packages("readxl")
library(readxl)
read_excel(data.xlsx, sheet = "sheet name", col_names = TRUE)
#How to read in .xlsx files
#First you have to install and load the readxl package
#You also need to insert the full path including the filename, but if you have set the work directory then you just need the filename
#You can specify the sheet name if there are multiple by either inserting the name in "" or by their numeric position
#Col_names = TRUE decides whether to use the first line data as the variable names